Old-Fashioned 14 Layer Chocolate Cake Recipe
The Ultimate Old-Fashioned 14 Layer Chocolate Cake
Growing up, my mother taught me classic southern baking. She carefully passed down many incredible vintage family recipes. Therefore, this stunning 14 Layer Chocolate Cake holds special meaning.
First, the rich cocoa aroma fills the kitchen quickly. Consequently, tasting that warm stovetop icing feels purely magical. You will absolutely adore this 14 Layer Chocolate Cake.
Furthermore, building this tall dessert feels incredibly rewarding today. Actually, every single soft bite melts in your mouth perfectly. Prepare yourself for the best 14 Layer Chocolate Cake ever.
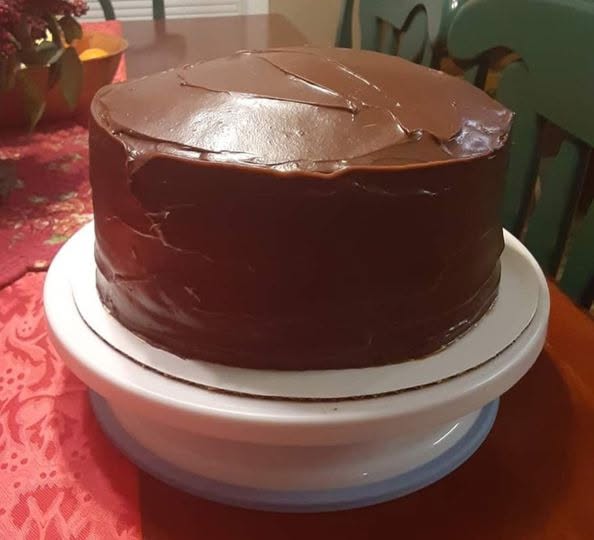
I always capture real, unedited photos of my desserts. Honestly, nothing beats the authentic visual appeal of homemade baking. Consequently, this towering masterpiece photographs beautifully without any artificial filters.
Why You Will Love This 14 Layer Chocolate Cake
-
Vintage Charm: First, this dessert brings pure nostalgia directly to you. My mother always baked these traditional treats gracefully. Thus, making this classic recipe honors deep family history.
-
Incredible Icing: Second, the cooked frosting tastes absolutely phenomenal. It creates a fudgy, rich layer between the thin sponges. Consequently, your beautiful dessert stays incredibly moist for days.
-
Showstopper Look: Next, the sheer height impresses dinner guests instantly. Everyone loves seeing those beautiful, thin, distinct baked layers. Therefore, this dessert guarantees a truly stunning visual presentation.
-
Perfect Balance: Finally, the sweet icing balances the light cake beautifully. You will taste pure culinary magic in every single bite. Indeed, a classic southern dessert never disappoints hungry guests.
Bakery-Level Pro Tips for Perfect Texture
Working as a busy barista taught me much about pairings. Meanwhile, professional kitchens demand absolute baking precision daily. Therefore, weighing your ingredients matters deeply for ultimate success.
First, sift your dry ingredients very thoroughly before mixing. This crucial step prevents awful, heavy, dense lumps completely. Thus, your baked sponge stays incredibly light and fluffy.
Moreover, use high-quality shortening for the absolute best crumb. It creates that signature, old-fashioned, tender cake texture reliably. Consequently, the thin layers absorb the warm icing perfectly.
Next, always wash your metal baking pans between batches. Grease them meticulously with high-quality baking spray every time. This prevents your delicate sponge layers from sticking disastrously.
Furthermore, do not overmix the final, wet cake batter. Whisk it just until the wet and dry components combine. Otherwise, your finished dessert becomes very tough and chewy.
Finally, make the delicious cooked frosting first before baking. It needs adequate time to cool down slightly. This ensures your thin dessert layers stack up perfectly straight.
Ingredients You Will Need
Let us gather our standard baking ingredients together today. First, you need basic pantry staples for the actual batter. Here is everything required for the sponge layers.
-
Shortening: One cup provides an incredibly tender crumb structure. It helps the thin layers hold their shape beautifully.
-
Large Eggs: Four eggs bind the entire batter perfectly together. Moreover, they add essential richness to the baked sponge.
-
Plain Flour: Three cups of all-purpose flour build the structure. Therefore, your thin cake layers will not collapse easily.
-
Baking Powder: Two tablespoons create the necessary, perfect oven lift. This chemical reaction makes the dessert incredibly light.
-
Whole Milk: Two and a half cups add vital liquid moisture. Sometimes, vintage bakers simply call this classic ingredient sweet milk.
-
Flavorings: Use one tablespoon each of vanilla and butter extracts. These essential liquids enhance the overall baked flavor profile immensely.
-
Sugar: Two cups sweeten the raw cake batter perfectly. Plus, white sugar tenderizes the crumb during the hot bake.
Now, gather the ingredients for the rich stovetop frosting. This specific cooked icing truly defines the entire vintage dessert.
-
White Sugar: Three cups sweeten the intense baking cocoa deeply. Consequently, the cooked icing tastes remarkably like traditional fudge.
-
Cocoa Powder: Six tablespoons provide that essential, deep chocolate flavor. Indeed, good cocoa changes everything about this specific dessert.
-
Butter: One whole cup adds glorious, luxurious, incredible richness. Furthermore, it gives the warm frosting a gorgeous, glossy shine.
-
Evaporated Milk: One can thins the sugary cocoa mixture perfectly. Thus, it cooks down into a beautiful, easily spreadable glaze.
USA Substitutions
Sometimes, you miss a specific necessary ingredient at home. Fortunately, easy baking swaps exist for many common grocery items. Let us explore clever alternatives for your home kitchen.
First, consider the required solid vegetable shortening ingredient carefully. You can certainly substitute standard unsalted butter instead easily. However, butter changes the final baked texture slightly.
Next, think about the classic butter flavoring extract used. If unavailable, simply double your pure vanilla extract amount instead. Your sweet dessert will still taste utterly divine regardless.
Moreover, standard whole milk easily replaces the “sweet milk” term. You absolutely need full-fat dairy for the best moisture retention. Consequently, skim milk ruins the delicate baked crumb completely.
Finally, canned evaporated milk remains totally essential for the icing. Do not use sweetened condensed milk under any circumstances. Otherwise, your finished frosting becomes painfully, unedibly sweet.
Step-by-Step Instructions
First, tackle the cooked stovetop frosting absolutely immediately. Melt the butter gently in a large, heavy saucepan. Then, mix the dry cocoa, sugar, and evaporated milk together.
Bring this sweet mixture to a rapid, rolling boil. Next, reduce the stove heat and cook it briefly. Stir it constantly for exactly two full minutes.
Remove the hot pan from the kitchen stove top. Let the thin icing cool down while you finally bake. Now, begin making the actual wet cake batter.
Preheat your oven to 375 degrees Fahrenheit very quickly. Sift your plain flour and baking powder into a bowl. Next, cream the solid shortening and sugar until very fluffy.
Add the four eggs individually, beating each one well. Then, alternate adding the dry flour mixture and the milk. Beat everything until the wet batter blends wonderfully.
Stir in the vanilla and the butter extract flavorings. Now, prepare your nine-inch round metal baking pans carefully. Grease them heavily and sprinkle them with dry baking flour.
Spread exactly half a cup of batter into your pans. Bake them until the thin layers turn very lightly brown. Remove them from the hot oven carefully and safely.
You must wash the pans after baking each layer. This strict rule prevents awful burnt batter buildup entirely. Repeat baking until you finish all the wet cake batter.
Finally, start building the epic, towering dessert masterpiece beautifully. Spread the cooled frosting generously between every single thin layer. Coat the top and the exterior sides completely with icing.
Storage, Freezing, and Reheating
Proper storage keeps your massive dessert fresh for days. First, place the leftover slices inside a large airtight container. The tall dessert stays incredibly moist this way.
Moreover, you can keep it safely at normal room temperature. The cooked frosting actually protects the delicate inner sponge perfectly. Therefore, the sliced cake lasts about four whole days.
Next, freezing this massive baked dessert remains remarkably simple. Wrap individual dessert slices very tightly with plastic cling wrap. Consequently, your delicious slices freeze beautifully for several months.
Whenever sugar cravings hit, just thaw a frozen slice easily. Leave it on the warm kitchen counter for one hour. You will enjoy your perfect dessert instantly again.
Frequently Asked Questions about 14 Layer Chocolate Cake
Can I use modern silicone baking pans? Actually, traditional metal nine-inch pans work much better here. They conduct the high oven heat very rapidly and evenly. Consequently, your thin cake layers bake perfectly flat.
Why is my cooked stovetop frosting too thin? Usually, you did not boil the hot liquid long enough. The wet mixture must reach a vigorous, full rolling boil. Then, you must cook it for two precise minutes.
Do I absolutely have to wash pans constantly? Yes, this tedious step remains absolutely critical right here. Otherwise, the old, baked grease burns the new delicate batter. Thus, taking your time guarantees the absolute best baking results.
Ingredients
Method
- For the Frosting
- Melt butter in a large 4-quart saucepan over medium heat.
- Mix in the cocoa powder, sugar, and evaporated milk smoothly.
- Bring the mixture to a rapid, rolling boil.
- Reduce heat and cook for exactly 2 minutes, stirring constantly.
- Remove from heat and let the thin icing cool completely.
- For the Cake
- Preheat oven to 375 degrees Fahrenheit.
- Sift the plain flour and baking powder together. Set aside.
- Cream the shortening and sugar in a bowl until fluffy.
- Add eggs one at a time, beating well after each addition.
- Add the flour mixture alternately with the whole milk. Beat until blended.
- Stir in the vanilla and butter flavorings completely.
- Grease 9-inch baking pans with shortening and sprinkle with flour.
- Spread 1/2 cup of batter into each prepared pan.
- Bake until the thin layers turn lightly brown.
- Remove layers to a wire rack to cool completely.
- Wash your pans thoroughly after baking each individual layer.
- Build the cake by spreading cooled frosting between every layer.
- Frost the entire top and outside edges generously.